Case Study
Fitted AI
From a Python script to a published iOS app with in-app purchases
Case Study
From a Python script to a published iOS app with in-app purchases
The Origin
When Google dropped their Nano Banana model, I saw an opportunity to test it — not with a benchmark, but with a real workflow. I built a CLI tool where I'd input a headshot, a medium shot, and some clothing items, then try to get the model to swap the clothing as a virtual try-on. The question wasn't whether AI could do it. The question was whether it could do it well enough that a real person would recognize themselves.
The first attempts were bad. The model would hallucinate facial features, distort body proportions, or produce something that looked more like a collage than a photograph. But I kept iterating on the prompt structure and input format, and over time I discovered that the model needed very specific conditions to produce quality outputs. It required multiple processing steps, not one. It required reference images in a particular order. And it required a minimum number of input images to maintain consistency.
As those pieces came together, the outputs went from unusable to surprisingly convincing. That's when the idea shifted from "interesting experiment" to "this could be a real app."
The technical stack evolved accordingly. What started as a handful of Python scripts with LLM API calls turned into a full FastAPI web server with SQL databases for user management, Redis for caching and session state, and Celery workers handling the image processing pipeline asynchronously. A single outfit generation could take 30 to 60 seconds depending on the complexity, so the async processing was essential — you couldn't have a user staring at a spinning loader while a synchronous API call waited on Gemini.
I wanted to make an iOS app because I thought it would be a fun product people could actually use, even if it never became a massive business. But honestly, the bigger draw was the process itself. Getting an app developed in Xcode, testing it on my own device, distributing it through TestFlight for beta testing, and then navigating Apple's review system — those are skills you can only learn by doing. And the credential of having a published app with in-app purchases is something that carries weight regardless of the app's commercial success.
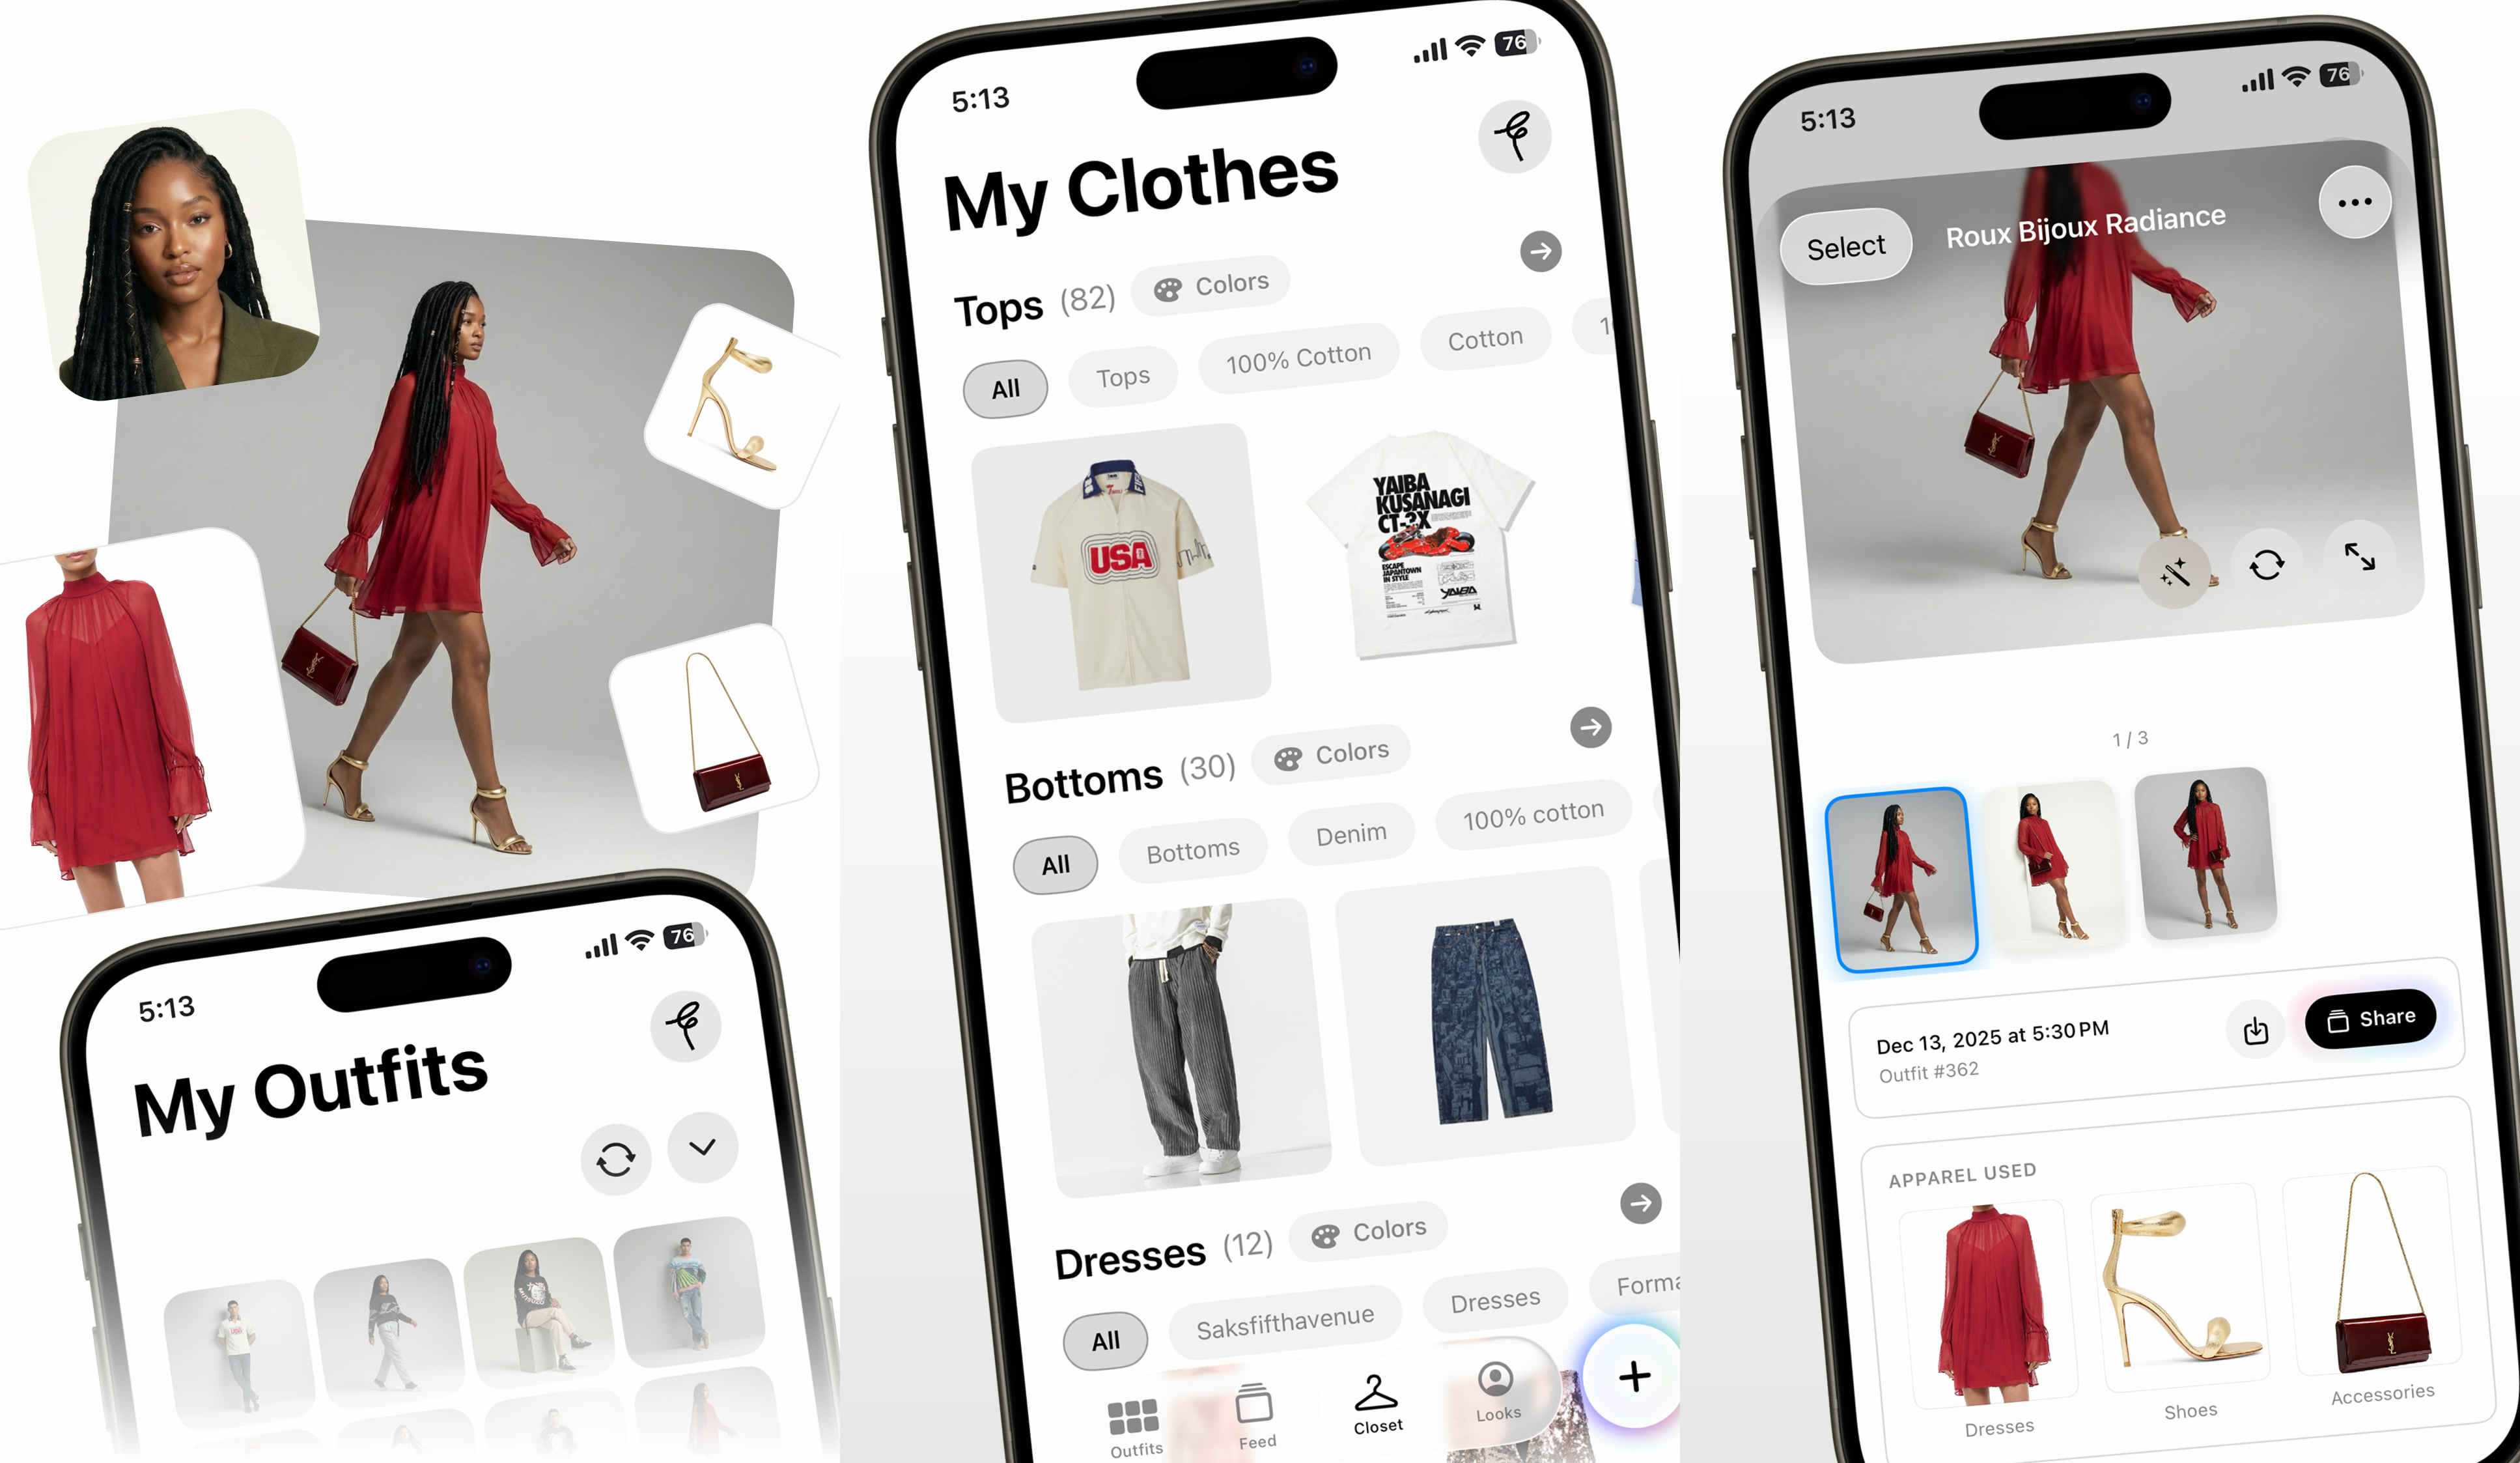
The avatar grid preprocessor. A single headshot is converted into a multi-angle composite, giving the model several perspectives of the subject while consuming only one image slot in the API call. This optimization reduced the required inputs from six images to four.
Learning iOS
I'd tried building iOS apps before — once using Expo for a React Native approach, and once going straight to Swift for a different project. Both times I was coding primarily with LLMs, and the models available at the time weren't adequate for writing good Swift code. I'd make real progress in the early stages when the codebase was small and the architecture was simple. But as complexity grew — more view controllers, more data flow, more edge cases — the projects became unmanageable. The LLM would start contradicting its own earlier code. It would suggest patterns that didn't fit the existing architecture. Debugging became harder than writing from scratch.
What made this attempt different wasn't a better LLM. It was a better process. Over the years between those failed attempts, I'd learned how to manage projects at scale: breaking work into small, isolated changes, maintaining thorough documentation that the LLM could reference, and understanding enough Swift myself to catch problems before they compounded. I couldn't write SwiftUI from memory, but I could read it well enough to know when the LLM was going sideways.
The hardest part of iOS development turned out to have nothing to do with code. It was Apple's approval process.
The requirements are rigorous and specific. Between submitting your app for review and getting feedback, you're looking at days. Sometimes a week, depending on when you submit. I was targeting a launch around the holiday season — either late December or early January. But Apple's review team slows down during the holidays just like everyone else, and the review cycles stretched from the usual 2-3 days to significantly longer.
I went through four submissions total. The first round flagged technical issues around in-app payments. Apple requires that any digital content purchased within the app uses their payment system, which meant integrating StoreKit and handling purchase verification, receipt validation, and subscription management. The second and third rounds hit policy issues. When I added the social feed — a discovery page where users could share outfits and browse other people's looks — it triggered a whole new tier of Apple's content policy requirements. Social features require content moderation capabilities, reporting mechanisms, and explicit user safety controls that a standalone utility app doesn't need.
Each rejection meant reading deeper into Apple's documentation, building additional features, and resubmitting. It was frustrating in the moment, but the result was a more robust app. After the fourth submission, I was approved with in-app purchases and authorized to do business in both the U.S. and the U.K. as an independent developer. That authorization isn't something you get automatically — Apple evaluates your business entity, your compliance with their guidelines, and the quality of your app before granting it. For a solo developer working without a client, getting that approval was a real milestone.
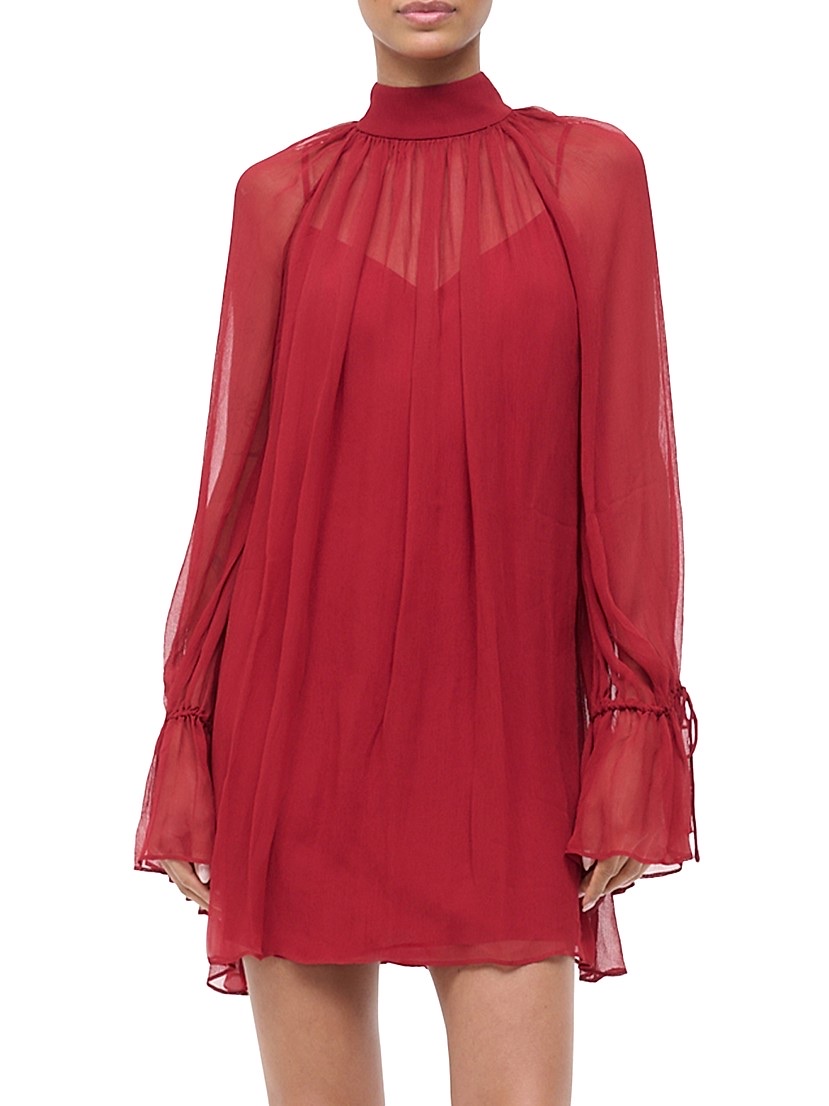
Input: One of four clothing images sent to the model. Front and back views of each item help the AI understand drape, texture, and fit.
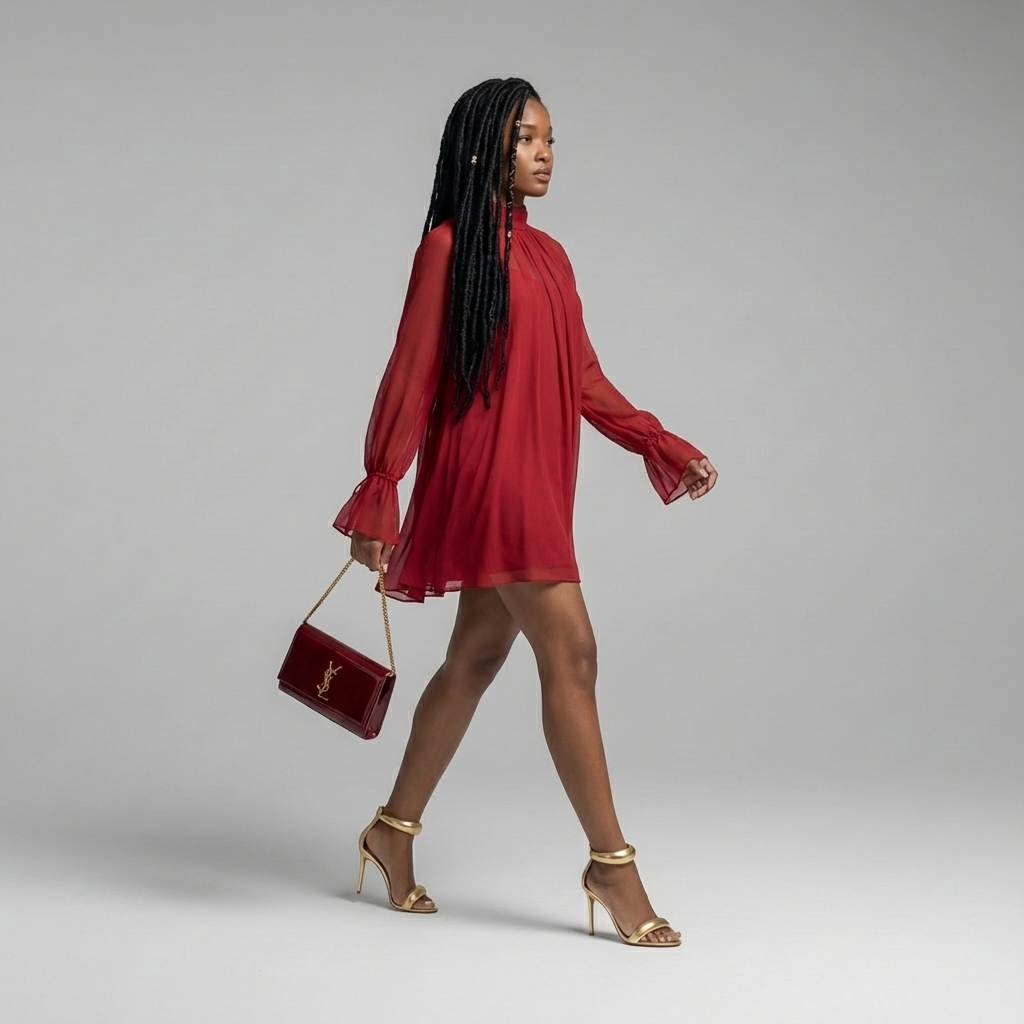
Output: The four-phase pipeline composites the dress, gold heels, and clutch onto the subject while preserving her likeness and pose.
The Product
The AI outfit generation workflow is more demanding than it looks from the outside. The core challenge is character consistency. The model needs to produce an image that a real person looks at and says "that's me." Any drift in facial features, skin tone, body proportions, or posture triggers the uncanny valley effect, and it hits hard. People are extraordinarily sensitive to their own likeness.
Maintaining that consistency requires a high-quality subject photo as the anchor. If the input image is blurry, poorly lit, or taken from too far away, the model loses the facial detail it needs to preserve resemblance. I learned early that the input quality was the single biggest factor in output quality — more important than the prompt, more important than the model version.
The standard workflow requires six input images. But through experimentation I discovered I could reduce that to four by rethinking how the subject reference was structured. Instead of sending multiple separate photos of the user, I built a preprocessing step that takes a single headshot and converts it into an avatar grid — a composite image with the subject's face shown from multiple angles and expressions in one frame. This gives the model several perspectives of the subject while only consuming one image slot in the API call. The freed-up slots go to clothing items: shoes, the front and back of shirts, outerwear, pants, accessories.
Even with optimized inputs, the generation can't happen in one shot. The workflow runs in phases. The first phase establishes the subject's body and pose. The second phase defines the outfit composition — which items go where, how they layer. The third phase handles the actual generation with the clothing composited onto the subject. And a fourth quality-check phase catches issues like clipping, proportion errors, or color inconsistencies.
This sequenced approach is what produces consistent, usable outputs. Without it — if you just throw all the images at the model in a single prompt — you get random gibberish. Clothing floating in space, faces melted into shirts, accessories fused to skin. Every failed generation burns your API credits for nothing. The multi-phase pipeline was born from hundreds of those failures.
Beyond the core generation workflow, I built a series of supporting tools. A color extraction script that analyzes clothing photos and generates accurate color tags for categorization. An aspect ratio normalizer that converts tall vertical photos to squares, because the aspect ratio of the input image actually impacts the generation quality — something I discovered through trial and error that isn't documented anywhere. Each of these tools started as a standalone Python script, proved its value, and then got integrated into the app's processing pipeline.
The documentation was extensive and intentional. Architecture plans, API specifications, workflow diagrams, prompt libraries, debugging logs, and feature roadmaps. This wasn't bureaucratic overhead. These documents served a dual purpose: they were my own reference for maintaining direction across a complex project, and they were context files that my LLMs could reference during coding sessions. When the LLM had access to an architecture document explaining how the data flow worked, it could write code that fit the existing patterns instead of inventing new ones. When it had a prompt library with tested templates, it could generate API calls that actually worked. The documentation was as much a tool for the AI as it was for me.
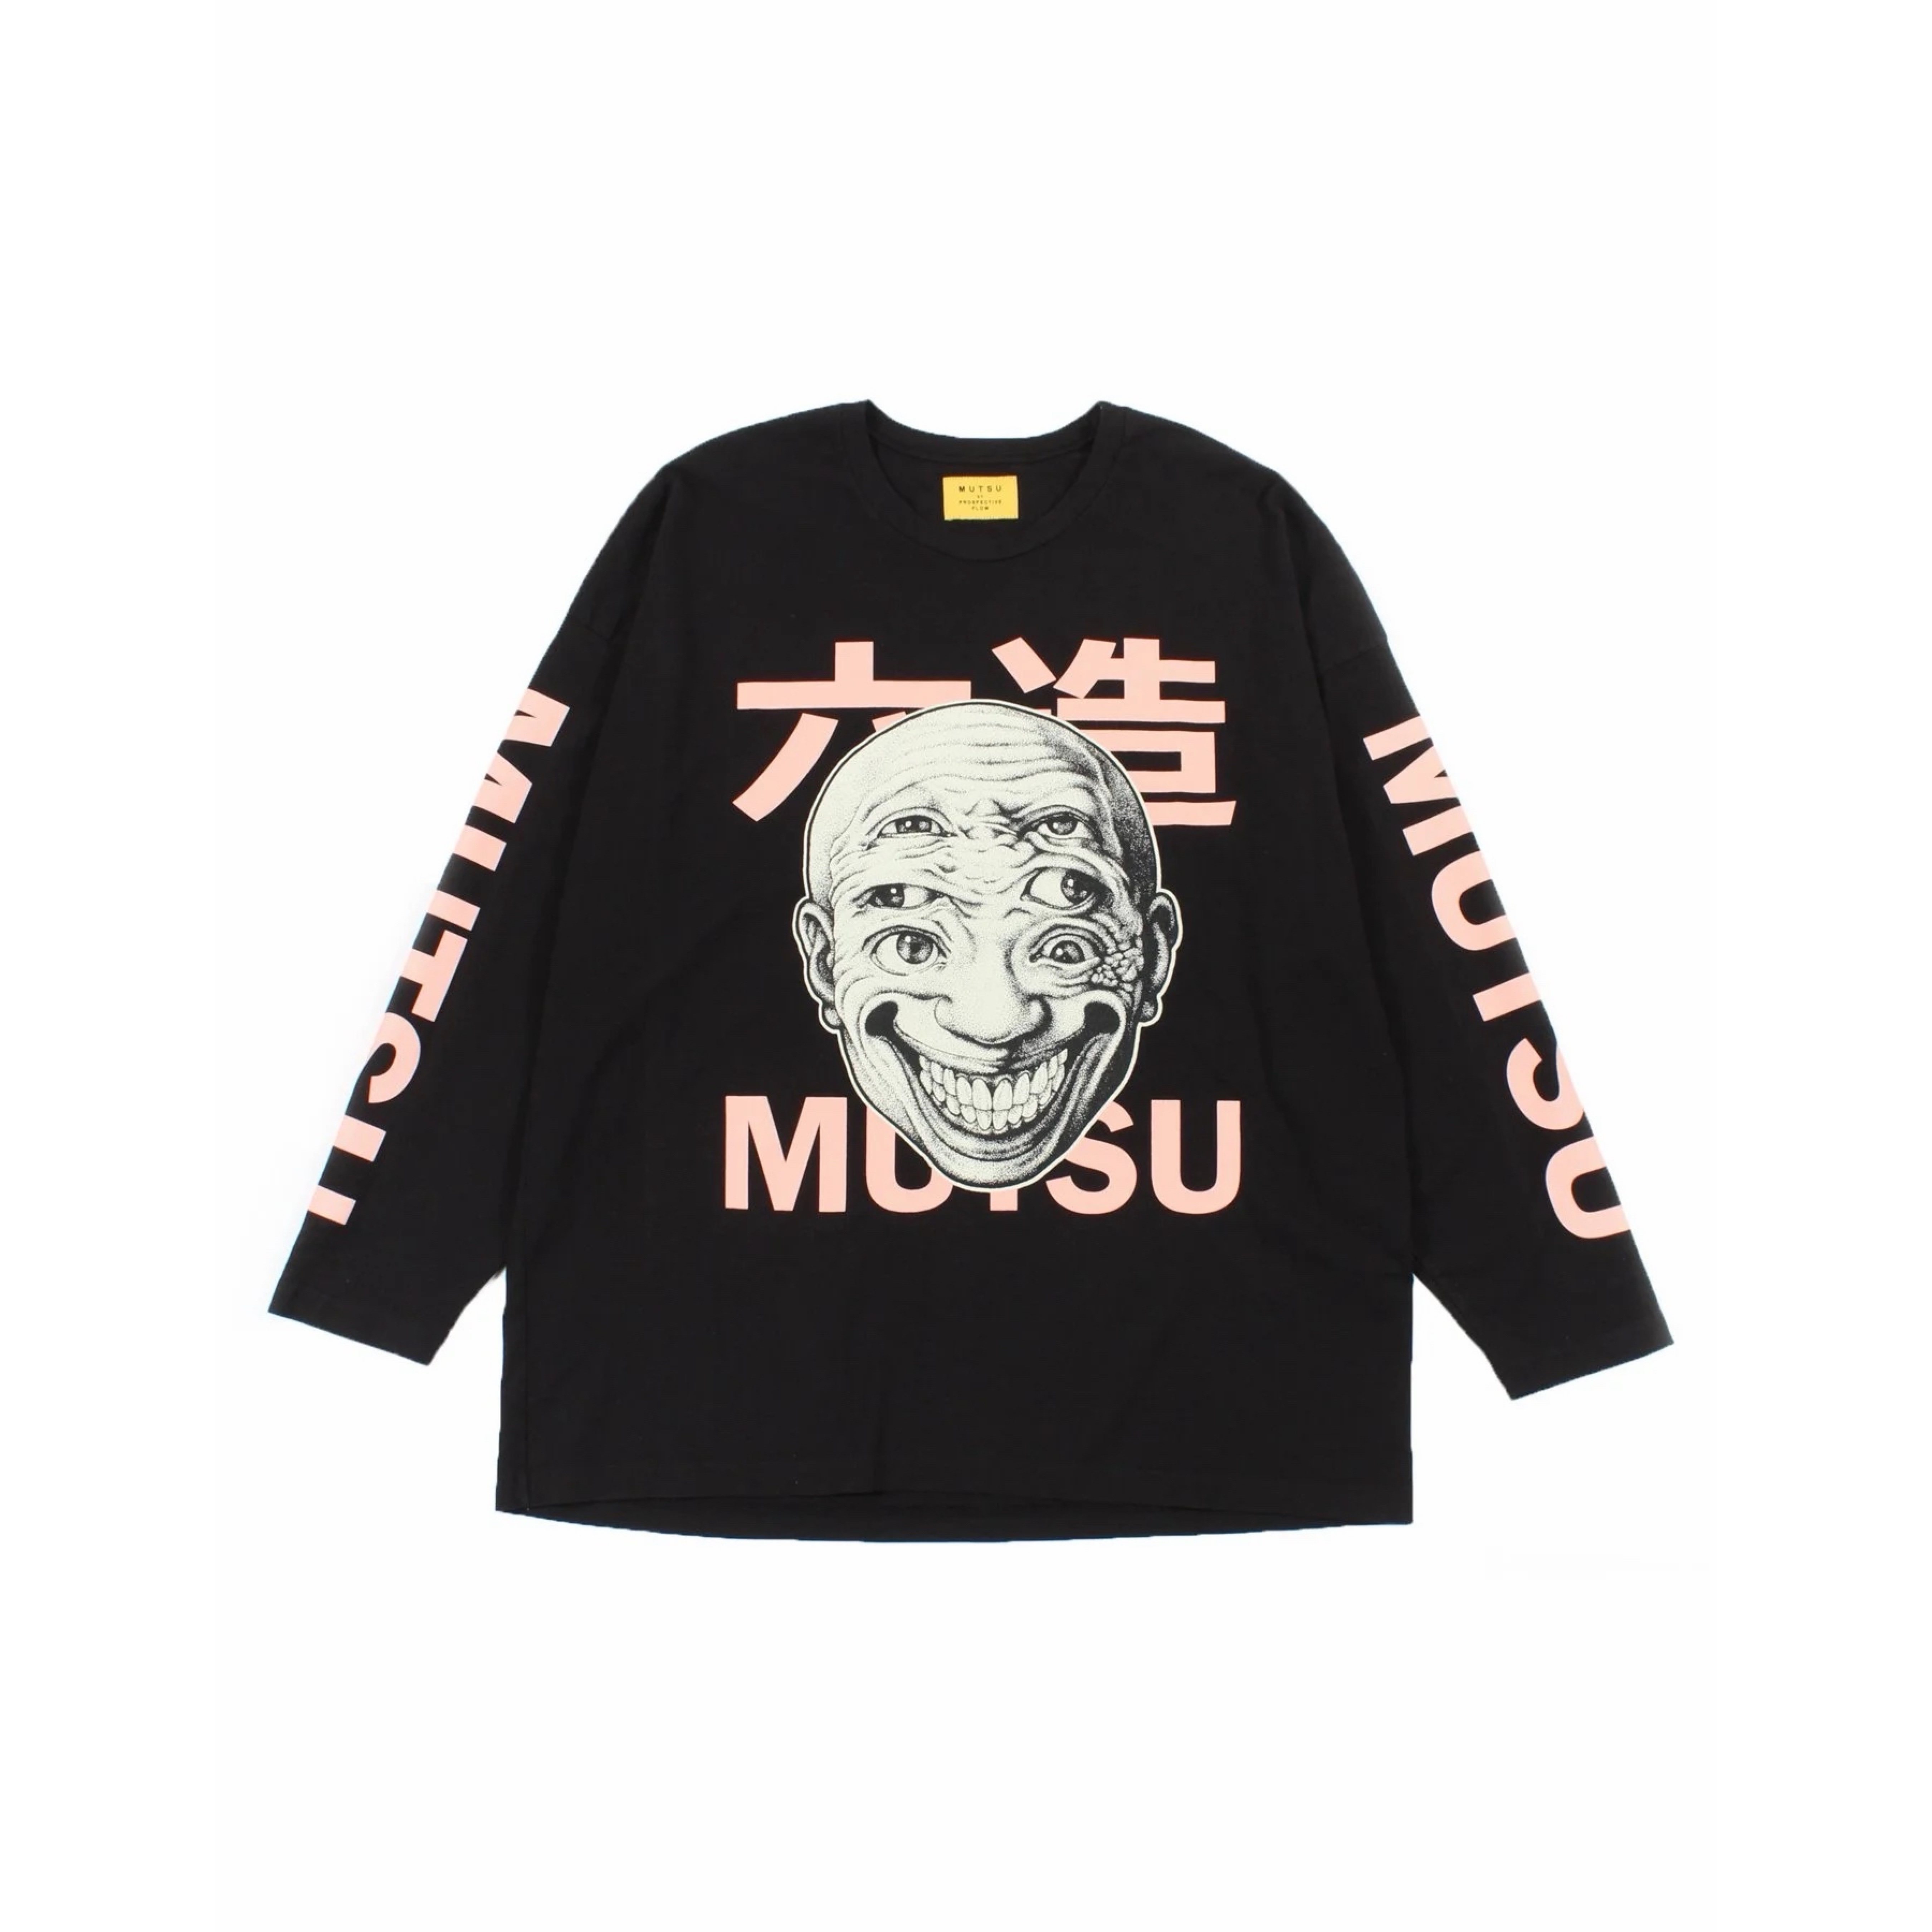
Input: A graphic tee with complex print detail. The model needs to reproduce text, artwork, and sleeve graphics accurately.
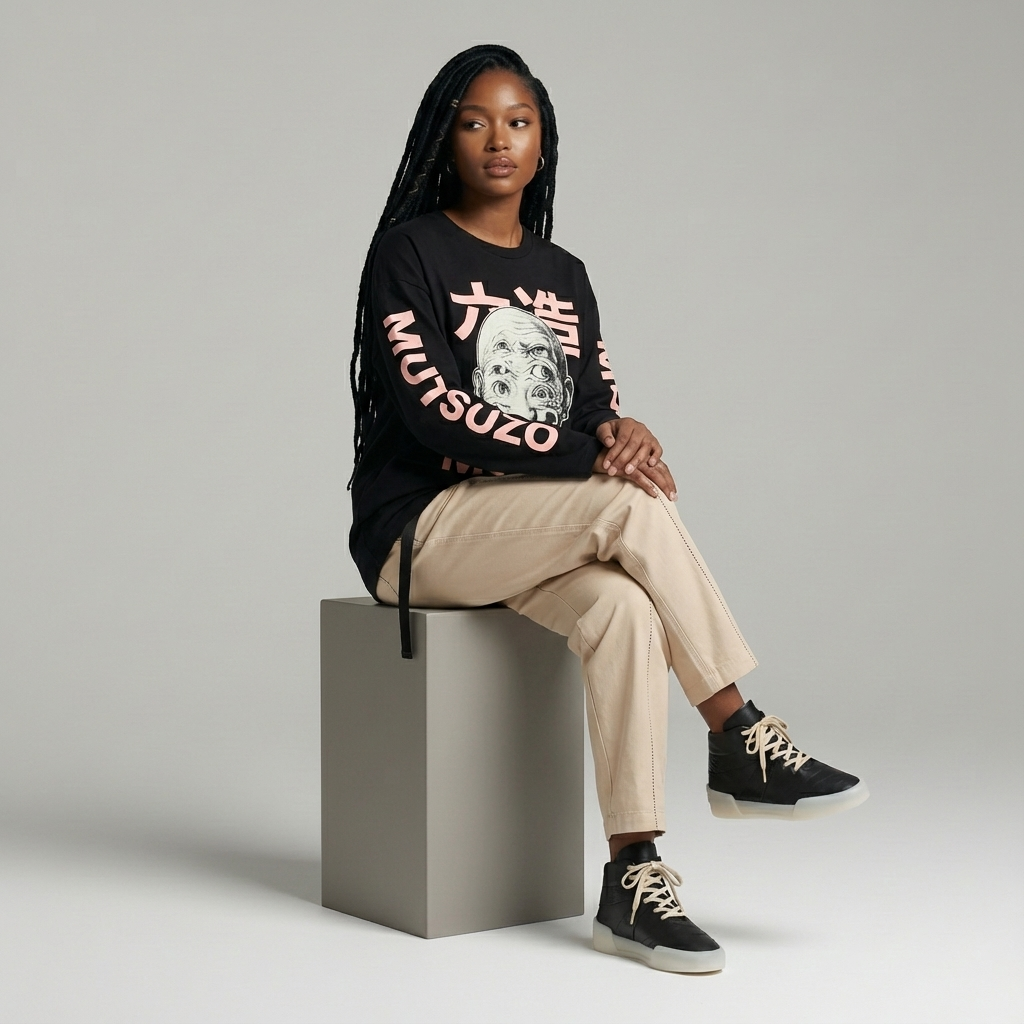
Output: The same subject in a completely different style. Character consistency holds across outfit changes, poses, and compositions.
Next Case Study
Fitted AI Video Series →